Railsアプリケーション等を簡単にインターネットに公開できるクラウドサービスHerokuのアカウント作成方法について説明いたします。
この記事は、Ruby on Railsを使いWebアプリケーションを開発して公開するのサポートと記事です。
HerokuのWebサイトを表示
Heroku
このURLから登録します。
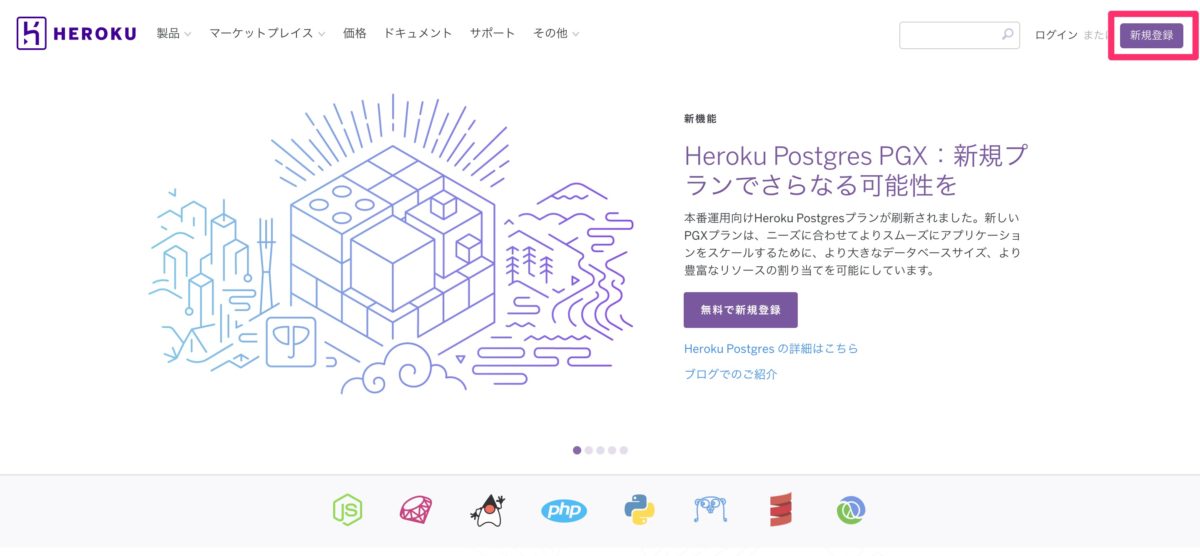
新規登録ボタンをクリック
必要事項を記入
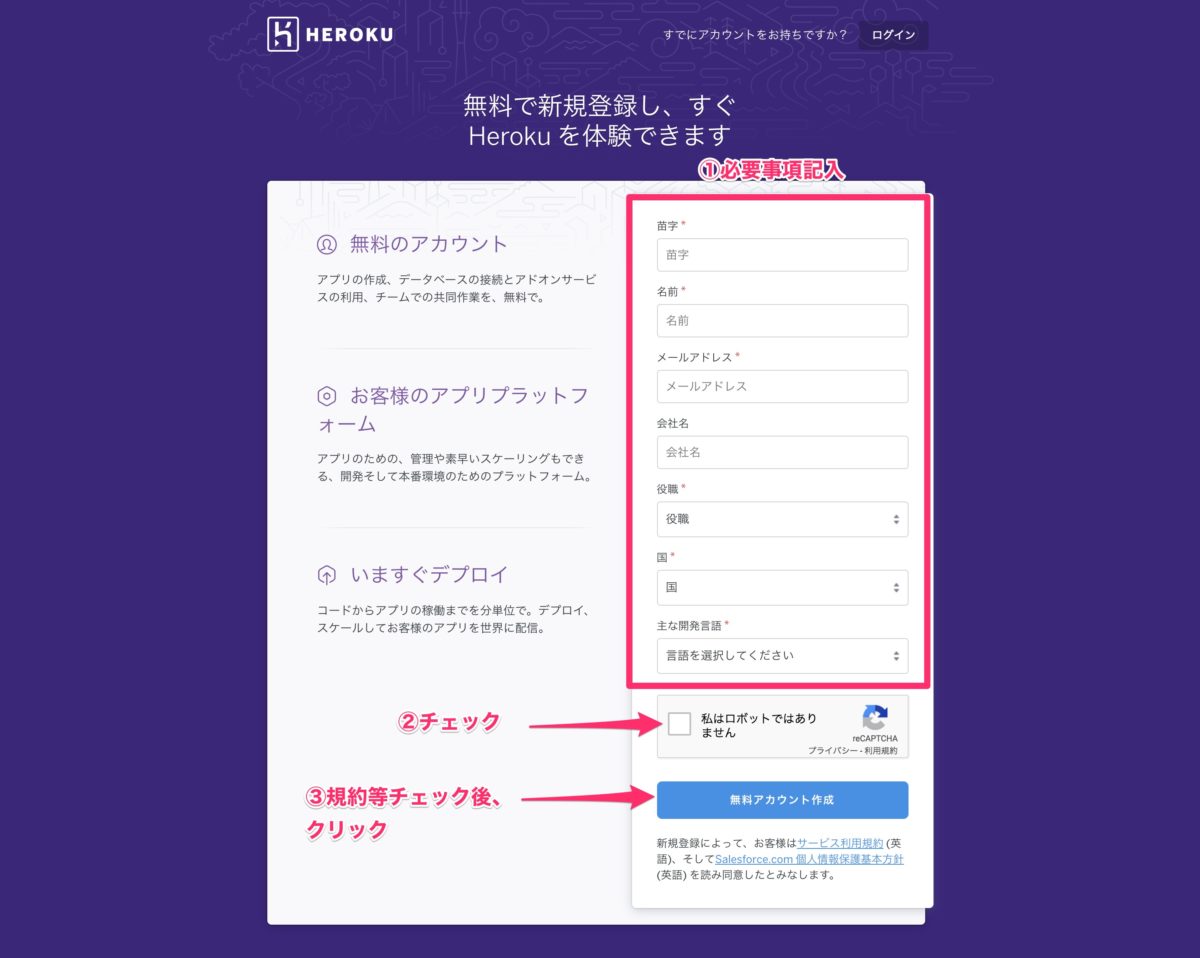
必要事項を記入します。
迷いそうな点について補足すると、
役職は、学習用途であれば「趣味でのご利用」、
主な開発言語は、「Ruby」、としておけば問題ないでしょう。
メールアドレス確認
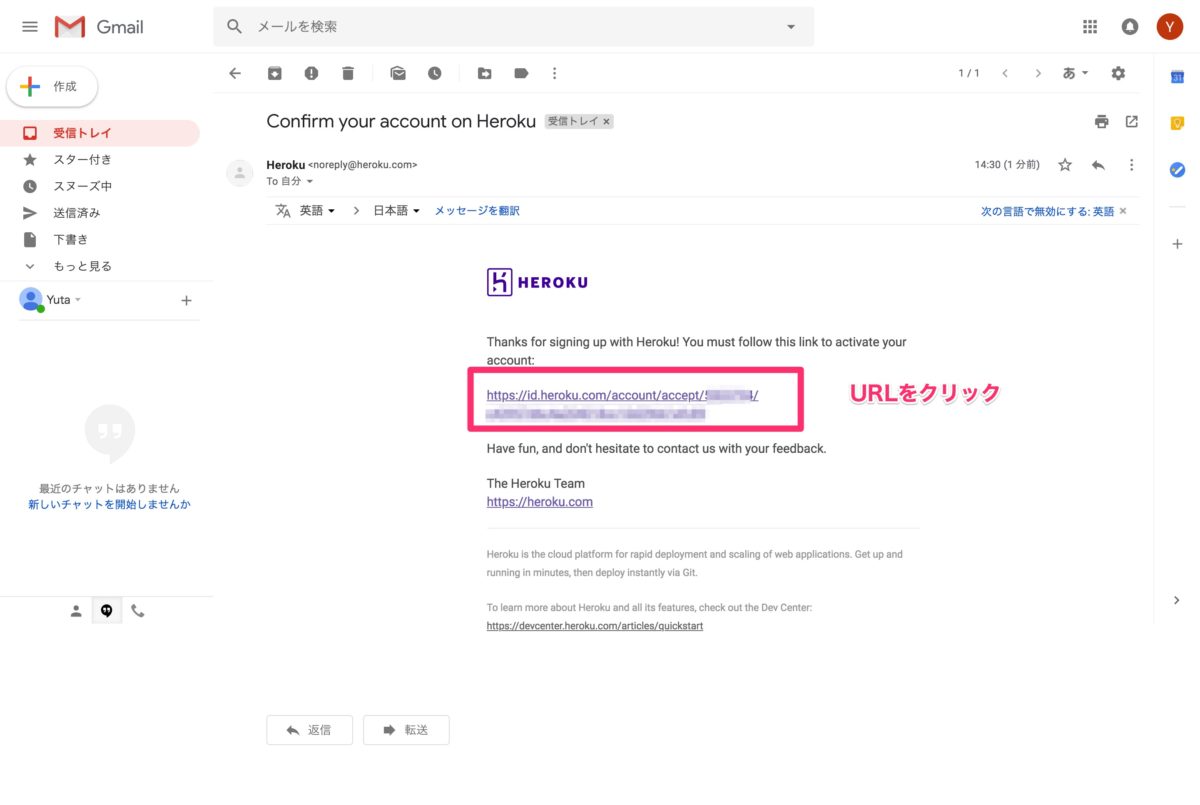
登録したメールアドレスに、確認メールが届きます。
記載されたURLをクリックして、確認を完了させます。
パスワード

セキュアなパスワードを設定します。
Herokuへようこそ
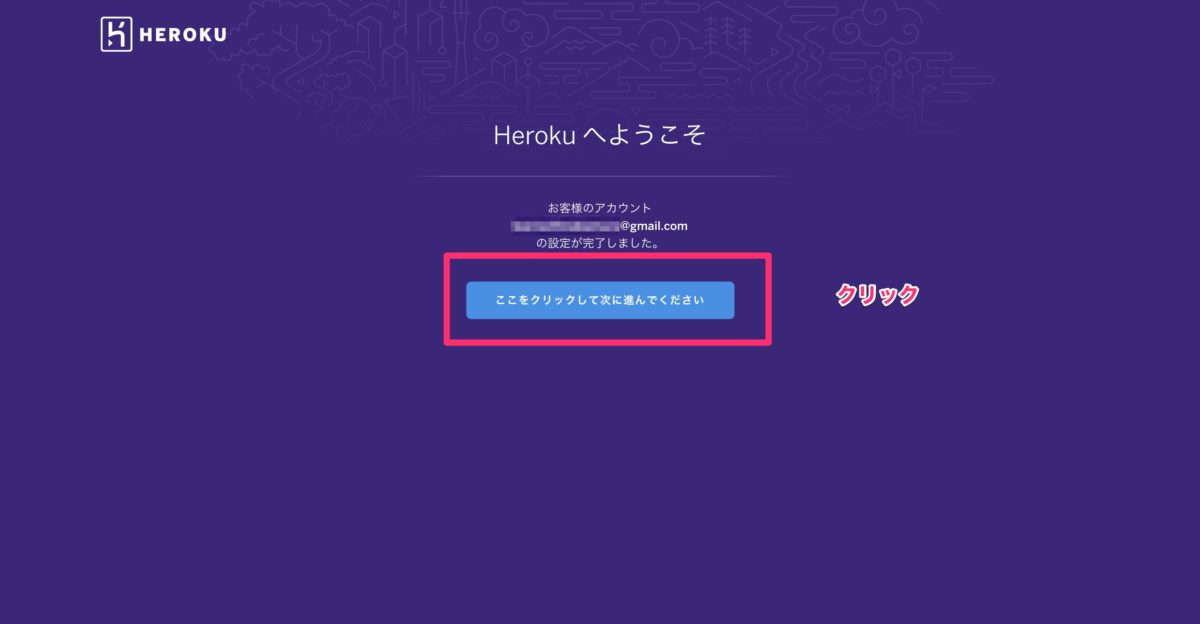
アカウント作成が完了しました。
ボタンをクリックします。
ログイン完了

ログインが完了しました。
おわりに
オンライン講座「Ruby on Railsを使いWebアプリケーションを開発して公開する」では、
汎用性が高くPythonやPHPと同様に人気のあるRubyを使ってWebアプリ作成に挑戦します。
基礎からAWSでの開発環境構築、Herokuを使ってWebアプリをインターネット上で公開するまでを体系的に学びます。
詳細は無料プレビュー動画を30分用意しましたので、ぜひUdemyのWebサイトでご覧ください! !
コース紹介動画

動画で学ぶプログラミング入門

オンラインスクールProglus(プログラス)でプログラミングを学んで、創れる人になろう!
在宅学習応援!今なら複数の基礎コースが無料!!
今すぐ詳細を確認する